 So, another week has gone, and few more projects were completed, and then Maura decided to add pattern tester to our job description!
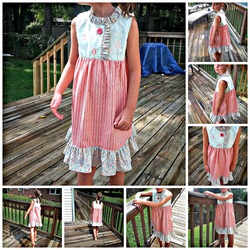
So, here it is. After copious notes and pictures here is the rundown of this adorable little number called the Bumblebee B dress from Sewing Mama RaeAnna. You can visit her blog or Facebook page from our Others We Love page.
So here it goes. First you must have a pattern. We use a lot of PDF patterns as they take up no space except on your hard drive and you print out only what you need. I like to trace onto interfacing (non-fusible) as you can see the fabric through it for optimal pattern placement.
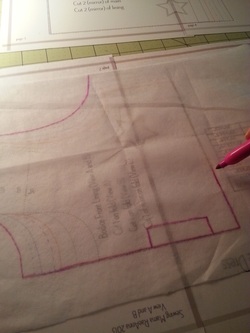 I use Sharpie simply because I have them and they don't rub or fade. The pink was merely because it was handy. Make sure you mark important things like fold lines (that box on the bottom of the picture indicates that the edge is to be placed on a fold), size, and which piece. In this case, this was a front bodice piece. I also like to put whether I have to cut one, or two, or if they should be mirrored, stuff like that. You do not want to cut something backwards, or upside down! Eek!!
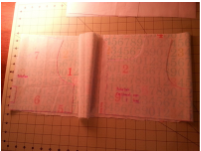 I cut the pieces as directed, though I streamline the process simply by folding the fabric strategically to get the most out of the piece I was using. See how you can see the pattern through the interfacing? It helps if you have specific portions of the fabric to be centered or showcased. :)
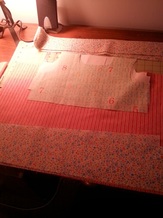 The rest were just strips to be cut straight across the fabric. Measure twice and cut once. In our case, we measure about 8 times, and then one more time, and THEN cut. Because we were testing the pattern I had to adjust a little to get the proper sizes, since some measurements weren't quite right. Here are the pieces ready to finally be put together!
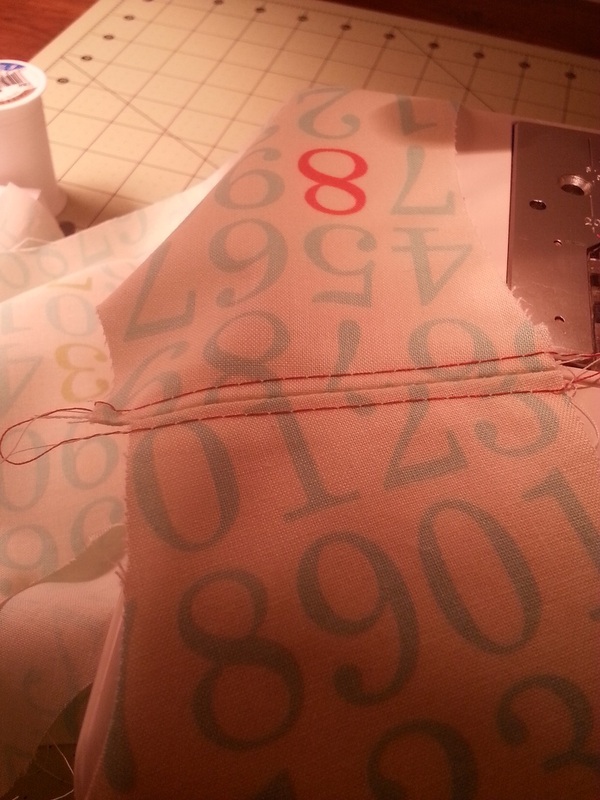
 And we start to sew. The directions had 3/8" seams. This is REALLY, SUPER important to follow the seam allowance or the size you thought you were making will turn out wrong. Here you can see the initial pieces were slightly off in size, but that is why we are testing the pattern, to work out the kinks. :) I just left it and then trimmed as I went along to make it even out.
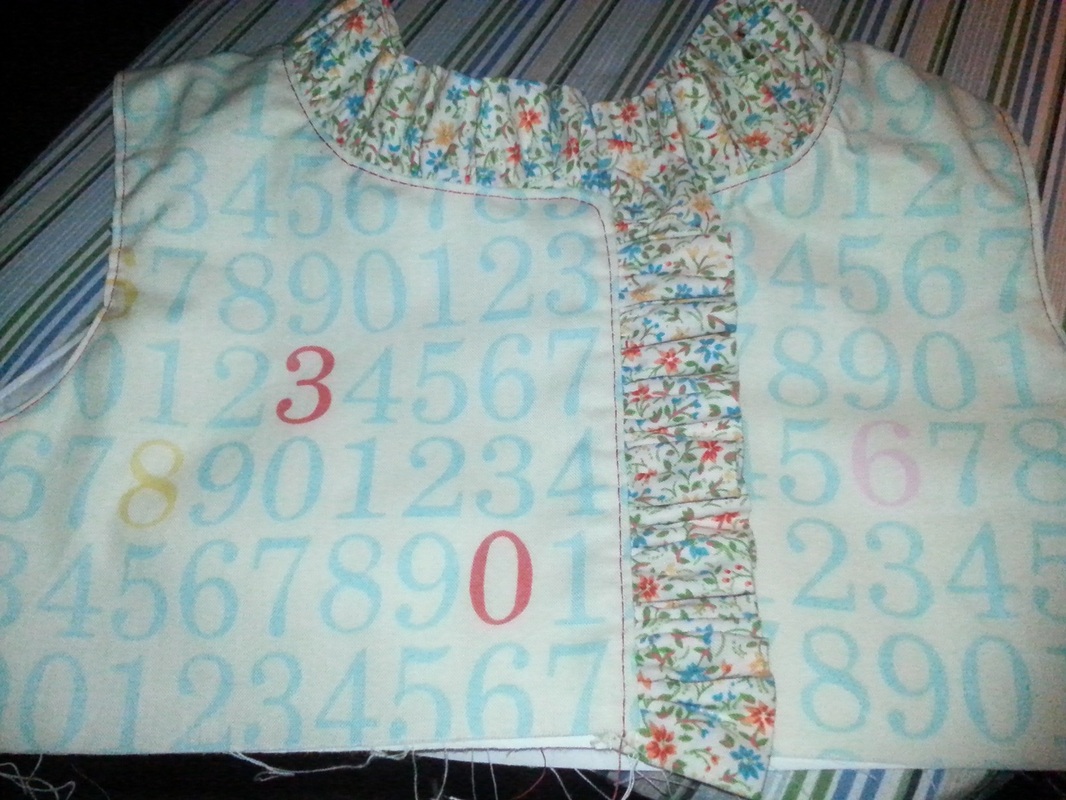
 Not a necessary step in most construction, but we always topstitch. We either color match or use a pretty contrasting color. It helps to add strength to the garment, as well as giving it that polished look. It takes the piece from being homemade to HANDMADE, and that is a huge difference. In this instance I had to do it at this point instead of after most of the construction was done because of the intricacies of the rest of the bodice. And the ends would be sewn up in the rest of seams. Clean and beautiful!
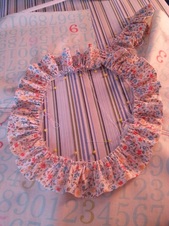 Remember when I talked about ruffles? You see all those pins? Yeah, we do that on everything that has ruffles. This ensures we get a nice, even ruffle all the way around. I don't know about you, but that is dedication right there!
Just keep ruffling!
 I like to finish of all the raw edges, even the ones that will be encased, to prevent unraveling and increase the strength. We use an overcast stitch, which is similar to a serged edge. Neat, clean, strong. Exactly what you need for clothing, especially on super active children!
 Here we have the whole bodice with the ruffle turned right side out. Before topstitching along the ruffle and the armholes, I snipped the seam in small intervals along the curves so it would lay flat. When you do this, you have to ensure you don't cut into the seam or the whole thing will either unravel or you may end up with a hole. Trust us...there is personal experience behind there...
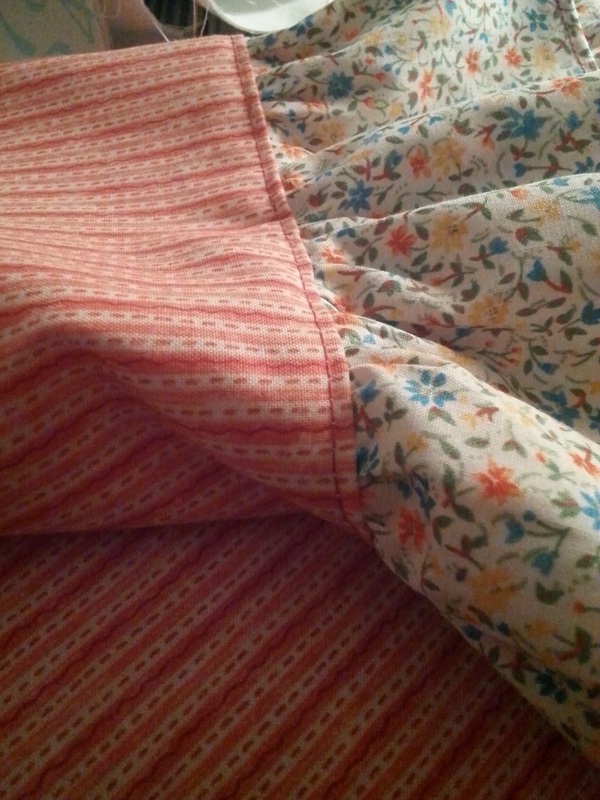
 We repeat the sewing process on the skirt and the skirt ruffle. This is just a close up of the skirt ruffle after being attached to the skirt. The straight stitch keeps the gathering in place while the overcast stitch has closed the edges and set the seam. Occasionally there are random threads poking out, we can just clip those.
 Topstitching, topstitching, topstitching! I make sure the seam is up away from the gathers, and then lock everything into place with this stitch. We use a longer stitch, but not the longest, about an 1/8" from the seam. The flap made from joining the 2 sections together are now secured and less likely to irritate the wearer or get caught on anything. Because I was testing this I didn't use my preferred method of using a flat felled seam, but that ensures that the raw edges are encased and everything is sewn flat. Now that I have made this once, I can start to utilize my other methods of sewing this together.
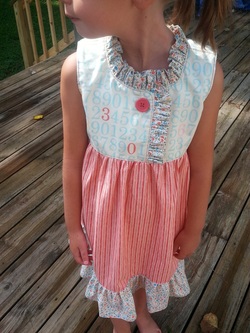 The final steps were to attach the bodice to the skirt and add the button. The methods for doing that are the same as above.
And here is the final product! There were small tweaks that we both found to be made to the pattern, and I am so pleased with the overall outcome with it. Plus, Ally doesn't want to take it off!
I think this will be added to our ever growing repertoire of pieces for you to choose from, but we want to know, what do you think?!
 Jen
 So we know that MJ and I both have children. A small army, really, of minions we created. And with that comes the countless hours of Disney movies and references in our lives. And you know what, I am okay with that.
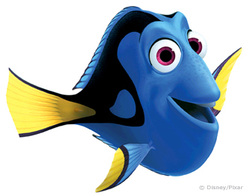
With that in mind, we have a daily battle with ourselves to "work" and balance the needs and wants of our children without going completely batty. So when we first started sewing all of these ruffley confections, there were moments, as we sat amidst miles and miles of fabric strips and mounds and mounds of ruffles, we would call each other in despair. This child has run off with my thread, that child has unraveled that ruffle, and on and on. And we would console each other and calm each other down, and one day, when the outlook was bleak and I thought I would never, ever, ever finish this dress, it came to me. It was Ellen DeGeneres' voice, embodied in a little blue fish named Dory, and it said, "Just Keep Ruffling". And so I began to hum it. And then sing it to myself. And then, I SHARED IT. With all the people like me who were trying to master this art of creating volume and fluff with bits of fabric. Because that is what we do, MJ and I. We share things, ideas, solutions, recommendations, recipes, jokes, patterns, loves.
And since we talking about ruffles, let me explain to you as briefly as I can what we do. Now we have tried just about every tutorial and method there is out there, and the best, most consistent way for us to do it, is to literally pin the life out of it. We use what is called a basting stich, a long loose stitch that goes the entire length of ruffle (which at times can be 13 yards or more!) then we begin pinning, evenly spacing the pins by taking the fabric in half, then in half again, and again, and again, and so on and so forth until there is almost nothing left to pin. Then we pull the magic thread, and then sew. Yes there are ruffle feet, and they work beautifully, but they make more pleated ruffles than gathered, so the use of the ruffle foot is for more specific purposes. I have a gathering foot as well, and it works well, but, it still isn't as good as the method we use. We are sticklers for consistency, to the point that one or both of us may eventually need a therapist, but for now, we think it is a special gift. A quality that sets us apart from the nonsense at the stores. Like MJ said before, we care, and we take the time to ensure that everything we do is as perfect as our human hands can achieve. And that is why I think it is so important for us to "Just Keep Ruffling". For you, and for ourselves.
Until next time!
 Jen
Details, what do I mean by details?! Well, let's just say that when I am doing something I like to know that I am doing it right. When it is something I really love doing, I want to know that I am doing it as close to perfect as possible. It has been a blessing and a curse throughout my life.
Though many people see sewing as a person just taking two pieces of fabric, making a few cuts here and there, throwing the pieces together on a machine, pushing down a foot pedal and voila! a finished piece of something. I am here to tell you that for Jen and I and many others that sewing it is by far so much more!!!
First comes the fabrics. Jen and I do not just go to the cheapest sections of any fabric store (in person or online) to get our fabrics. While some places to have quality fabrics at low-ish prices most cheap fabric is just that, CHEAP!! Which means that fabric will not wear the test of time, nor will not hold their colors for long. It may shrink in funny directions and is just not worth the time and effort needed to make that amazing final product. While Jen and I do strive to purchase our fabrics in the most economical way possible, we refuse to purchase cheap crap, period. It may cost a bit more but the quality makes a huge difference and I have always believed in QUALITY vs QUANTITY! I would rather make one outfit that will last for generations than to make 10 outfits that won't last until next year.
Next comes construction. Jen and I are certainly your "measure twice, cut once" type of people. In fact, I find myself sometimes double, triple or quadruple checking the measurements before cutting simply because it has to be exactly right. This also goes for fabrics that have a true directional print, no matter how subtle, if it is there we are going to do our absolute best to make sure that everything is going in the correct direction and that no matter which section of the outfit you are looking at everything lines up as closely as possible. Nothing looks worse than to see a piece where things just don't line up, especially when the print is large! Drives me bonkers!!
Than we come to the little touches. Things like flat felled seams, consistent ruffles/gathers, precise thread tucks, and top-stitching. While to most people they probably wouldn't notice these things unless pointed out to them, to Jen and I, these are huge. For starters, we want every piece to be comfortable and durable. We want the children and/or adults wearing our pieces to be truly comfortable in whatever activities they enjoy and we want our pieces to last wash after wash, year after year. We want people to know and trust that when they purchase something from us, it is well worth the money and it is something they can pass down via sibling to sibling, cousin to cousin, friend to friend, family to family, or generation to generation. We face our flat felled seams outwards and in the same directions so that the wearer can have a nice smooth surface on the inside and avoid rubbing on the outside. Flat felled seams also create very strong seams that will most certainly pass the test of time, washing and wearing. While Jen and I do have slightly different methods of ruffling, we do have consistent methods for gathers. No matter which one of us creates something for you though the end result will be the same quality and comfort that you will come to expect, know and trust with us. Thread tucking, what does this entail? Whenever you have a store purchased item you are bound to find that one little thread that when it gets pulled, snagged or cut your outfit (that you spent good money on) begins to fall apart. This can happen on the bottom hem of a shirt or along the inner seam under the arm or pretty much anywhere for that matter. Why does it happen? Well simply put the person sewing it ended their threads, cut it and moved on. Anytime that I have an ending thread, that will not be encased and be stitched over in another section, I always knot those threads and thread them back inside the garment. This may seem a bit extensive, even with modern machines that do a wonderful job of anchoring a thread but I don't ever want any of the pieces I create to ever succumb to one little thread. I would honestly be devastated and it is a pet peeve of mine about store bought clothing so I refuse to allow it to happen to any of my pieces! As for top-stitching, this really helps to anchor a garment, secure a seam where a flat felled seam is just not appropriate and gives an overall polished look.
I know that for some details can be boring or not seem to be worth their time but I can guarantee you that they are more than worth mine and Jen's time. They are a necessary and will always be taken seriously. I wholeheartedly believe that they are also something that sets us apart from others. It will always be QUALITY over QUANTITY and it is all due to the details!!
Yours Truly,
Maura Jean *Disclaimer: While I am American and I have taken many English courses I am a phonetic speller and terrible with grammar. I do my best to re-read and spell check everything possible but please forgive me if there are any mistakes, I really do try my best! :)
|


 RSS Feed